


I decided that the round , bow-style wingtips were not for me. I wanted something more "square". This is my attempt at that....these have not been flown or engineered by anyone credible. Don't try this at home...these are my "experimental" attempt at making a different style wingtip. I will post part photos when I get them done. These are just the process of making the plugs and using the plugs to make the molds.
I am cheap...so I bought foam at Home Depot in thin sheets, and used spray adhesive to glue 6 sheets together. Total cost: $6
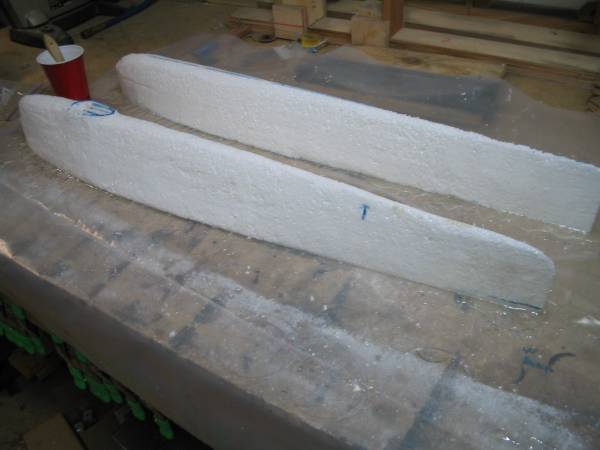
I used a hot wire tool to cut out the basic shape first:
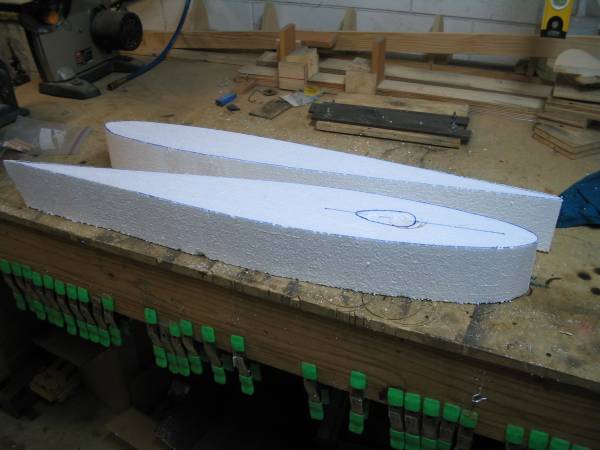
From there, you have to freehand the shape you want. You can see where I outlined the spot that will have a flat recess for mounting a light on the top wingtip. So, I kept shaping....a coarse rasp or file works well here.

After you have the basic shapes carved in foam, the next important step is to coat the foam in clear epoxy. Later in the process, I am going to use body filler, which is easier to shape....but body filler is usually polyester based, which will eat away at the cheap styrofoam I am using. The blue foam may not be victim to this, but I digress...I used cheap foam. The clear epoxy will stop the foam from being affected by the body filler.
I have no good pictures of the next step, but it is long and tedious....coat the entire part with some fiberglass-filled body putty...the green stuff that Bondo sells will work OK. Put it on thin and sparingly...when it is cured, sand to a coarse finish and coat with a thin coat of regular creamy body filler. I don't recommend Bondo-brand as it is cheap crap. Go to the auto paint store and get some good stuff...they can help you with several good brands, but all will agree that Bondo-brand is crap.
You will spend night after night spreading filler, sanding to shape, until you get the shape you want. When you reach that goal, spray with primer and paint. Remember...THE BETTER THE PLUG, THE BETTER THE PART!!!
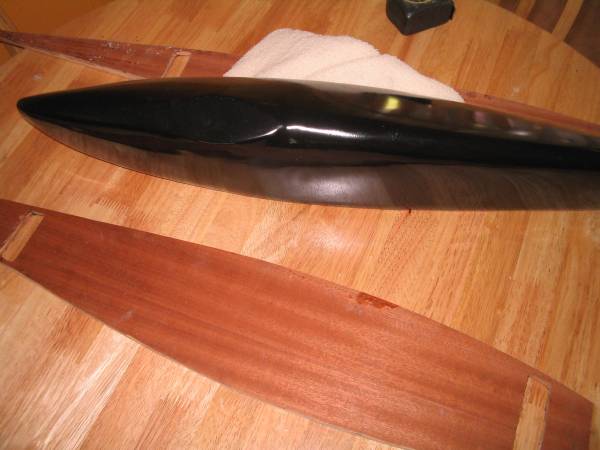
I have a finished plug that mirrors what I want the part to look like. It fits the last outer rib of the upper wing, pictured together above.
Next, you are going to make a mold from the part. You have to build a box that will hold the plug so that exactly half of it is exposed above the centerline, as pictured below. I used 2/4's and 1/4" plywood to make mine. Shown below is the plug laying in this box:
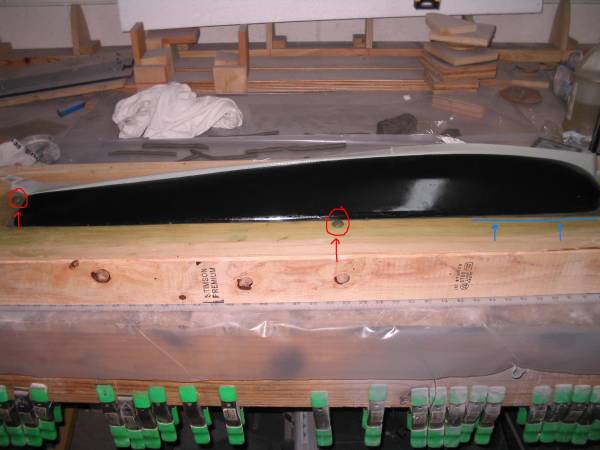
The red arrows in the pic above point "buttons" that are made of clay. These will help you locate the two halves of the mold later, when you split them. Underlined in blue you can see where I used oil-based clay to fill in the gap between the plug and the plywood base. There is wood suporting the part underneath the box that is not visible....so the plug is positioned in the plywood with the plywood aligned with the centerline of th part.
Next step is to put duct tape along the back edge to keep the mold epoxy from flowing over the sides. The plug must be coated in about 3 coats of non-silicone mold release wax. After coating with wax, you need to spray on some PVA mold release agent. I have a cheap HVLP gun I use tospray it with...the trick being to mist it. You want a shiny, solid coat after it dries, and mist is the only way to do this.This PVA is the green tint you see on the wood int he pic above. I use a brush to slather on the pva thick on the wood only.
Next step: Coat plug with Fiberglast 1099mold surface coat. Warning: This stuff is thick....very thick, until you put the Part B catalyst in it. You'll need a dowel or similar to stir it, as sticks will break....yea, it's that thick! Slather it on about 1/8" thick and work fast...you have about 20 minutes before it starts to set.
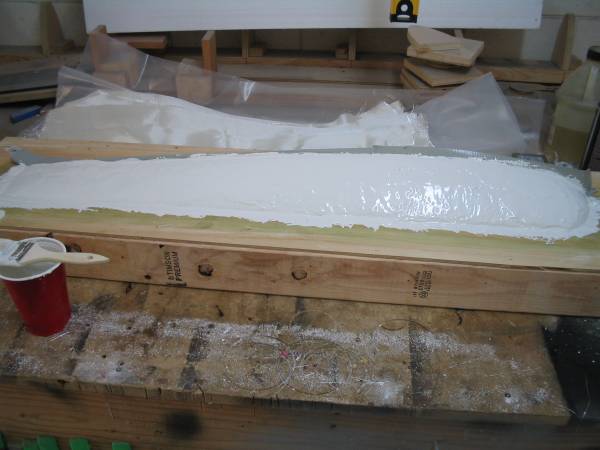
Don't let it cure too long...when you can run a dry brush over top of it, leaving brush marks but without the brush getting any white coat on it, it's justtttt right. I mixed flox with epoxy and applied around the edges and put 2" wide strips of glass on top of the flox around the edges. Now you start adding cloth layers on top of it all, carefully wetting them out with a brush. I used Aeropoxy 2032/3660 and heavy 750010oz cloth. Ten layers should work for most smaller parts, larger stuff you may want to go thicker.
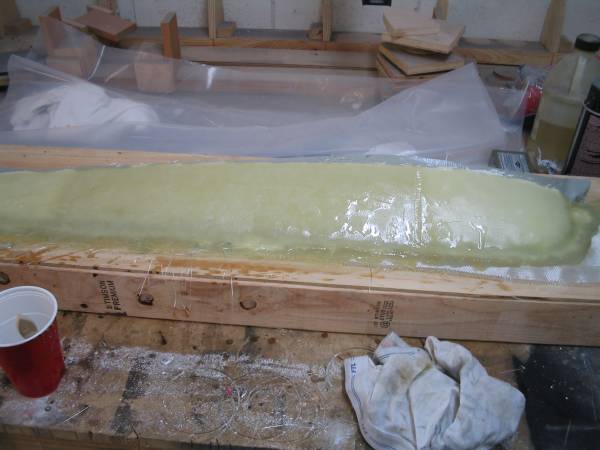
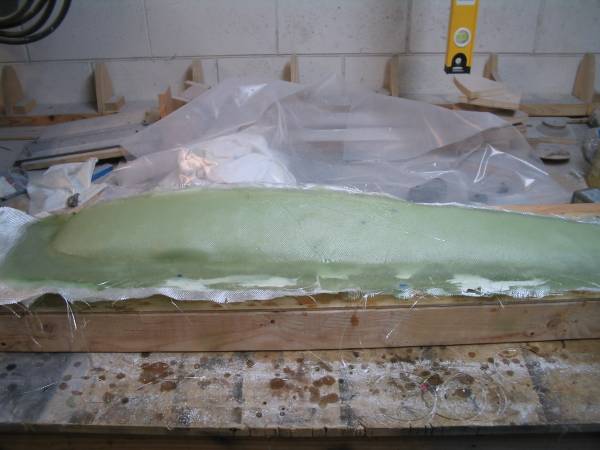
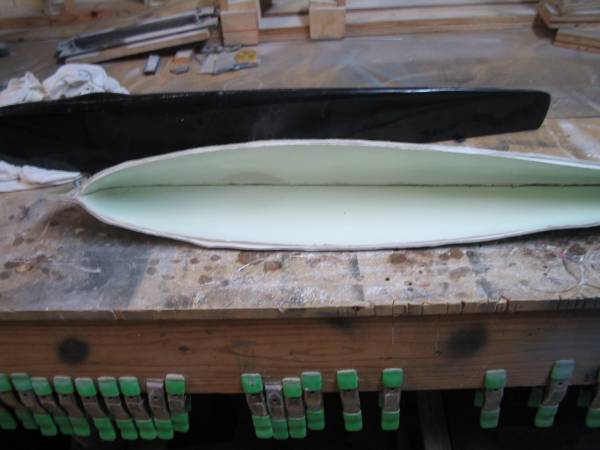
Let this cure for about 24hrs (if above 80deg F). Carefully pry it up fromt he box and flip it over...leave the plug in the half and do the same for the other side. But first, remove any clay remnants. Then wax, PVA, surface coat, flox the edges, strips, then10 layers of cloth. You'll end up with this:
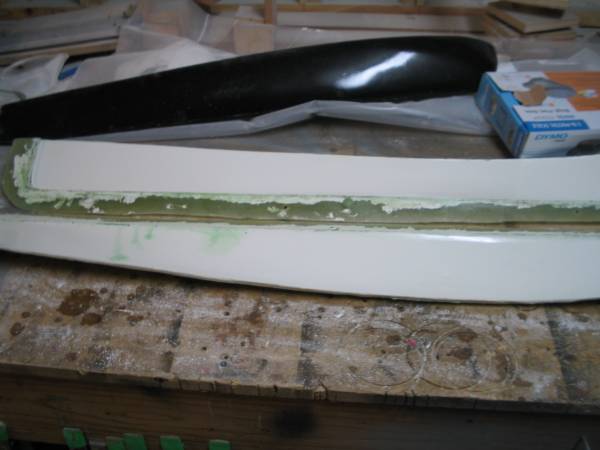
Now, drill about 4 holes around the edge/perimeter. Insert 1/4" bolts and nuts to hold the two halves together. Use a bandsaw/jigsaw to trim the edges to proper width. You'll need to peel off the duct tape on the back edge and grind off the over-hang. WHen finsihed, remove the bolts and carefully peel the two halves apart, being careful not to damage the plug.
Next, I start making parts....I'll post that later.
Comments, suggestions always welcome.
I am cheap...so I bought foam at Home Depot in thin sheets, and used spray adhesive to glue 6 sheets together. Total cost: $6
I used a hot wire tool to cut out the basic shape first:
From there, you have to freehand the shape you want. You can see where I outlined the spot that will have a flat recess for mounting a light on the top wingtip. So, I kept shaping....a coarse rasp or file works well here.
After you have the basic shapes carved in foam, the next important step is to coat the foam in clear epoxy. Later in the process, I am going to use body filler, which is easier to shape....but body filler is usually polyester based, which will eat away at the cheap styrofoam I am using. The blue foam may not be victim to this, but I digress...I used cheap foam. The clear epoxy will stop the foam from being affected by the body filler.
I have no good pictures of the next step, but it is long and tedious....coat the entire part with some fiberglass-filled body putty...the green stuff that Bondo sells will work OK. Put it on thin and sparingly...when it is cured, sand to a coarse finish and coat with a thin coat of regular creamy body filler. I don't recommend Bondo-brand as it is cheap crap. Go to the auto paint store and get some good stuff...they can help you with several good brands, but all will agree that Bondo-brand is crap.
You will spend night after night spreading filler, sanding to shape, until you get the shape you want. When you reach that goal, spray with primer and paint. Remember...THE BETTER THE PLUG, THE BETTER THE PART!!!
I have a finished plug that mirrors what I want the part to look like. It fits the last outer rib of the upper wing, pictured together above.
Next, you are going to make a mold from the part. You have to build a box that will hold the plug so that exactly half of it is exposed above the centerline, as pictured below. I used 2/4's and 1/4" plywood to make mine. Shown below is the plug laying in this box:
The red arrows in the pic above point "buttons" that are made of clay. These will help you locate the two halves of the mold later, when you split them. Underlined in blue you can see where I used oil-based clay to fill in the gap between the plug and the plywood base. There is wood suporting the part underneath the box that is not visible....so the plug is positioned in the plywood with the plywood aligned with the centerline of th part.
Next step is to put duct tape along the back edge to keep the mold epoxy from flowing over the sides. The plug must be coated in about 3 coats of non-silicone mold release wax. After coating with wax, you need to spray on some PVA mold release agent. I have a cheap HVLP gun I use tospray it with...the trick being to mist it. You want a shiny, solid coat after it dries, and mist is the only way to do this.This PVA is the green tint you see on the wood int he pic above. I use a brush to slather on the pva thick on the wood only.
Next step: Coat plug with Fiberglast 1099mold surface coat. Warning: This stuff is thick....very thick, until you put the Part B catalyst in it. You'll need a dowel or similar to stir it, as sticks will break....yea, it's that thick! Slather it on about 1/8" thick and work fast...you have about 20 minutes before it starts to set.
Don't let it cure too long...when you can run a dry brush over top of it, leaving brush marks but without the brush getting any white coat on it, it's justtttt right. I mixed flox with epoxy and applied around the edges and put 2" wide strips of glass on top of the flox around the edges. Now you start adding cloth layers on top of it all, carefully wetting them out with a brush. I used Aeropoxy 2032/3660 and heavy 750010oz cloth. Ten layers should work for most smaller parts, larger stuff you may want to go thicker.
Let this cure for about 24hrs (if above 80deg F). Carefully pry it up fromt he box and flip it over...leave the plug in the half and do the same for the other side. But first, remove any clay remnants. Then wax, PVA, surface coat, flox the edges, strips, then10 layers of cloth. You'll end up with this:
Now, drill about 4 holes around the edge/perimeter. Insert 1/4" bolts and nuts to hold the two halves together. Use a bandsaw/jigsaw to trim the edges to proper width. You'll need to peel off the duct tape on the back edge and grind off the over-hang. WHen finsihed, remove the bolts and carefully peel the two halves apart, being careful not to damage the plug.
Next, I start making parts....I'll post that later.
Comments, suggestions always welcome.