


AlRice
Well-Known Member
- Joined
- Aug 18, 2006
- Messages
- 262
- Reaction score
- 0
<div style="margin-right: -0.5in;">Rudder pedals were my first steel projects on my
Skybolt. The reason for this was:
<div style="margin-right: -0.5in;">1. I need
practice welding.
<div style="margin-right: -0.5in;">2. If I ruined
a part, I wasn't out a lot of money or time.
<div style="margin-right: -0.5in;">3. The parts
would be ready when I needed to weld them into the fuselage.
<div style="margin-right: -0.5in;">4. They
wouldn't take up a lot of storage space.
<div style="margin-right: -0.5in;">
<div style="margin-right: -0.5in;">
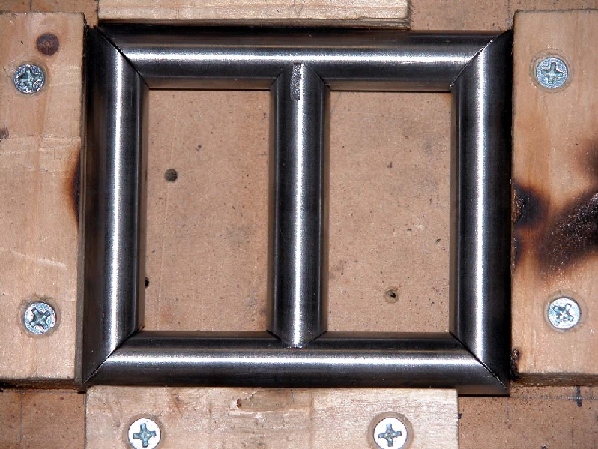
I made the easiest part first, the passenger brake
pedal. I rough mitered them a little
bigger than the dimensions then trued them up on my 12" disc sander. I jigged them on the table for fitting and
welding.
<div style="margin-right: -0.5in;">
<div style="margin-right: -0.5in;">
The pilot brake pedals are the same as the passenger
pedals except for the center tube which gets a brake arm welded to it. The center tube was notched on my tubing
notcher but could easily be done on the bench grinder. Do not weld the axle tabs on the brake pedals
until the rudder pedal slugs are welded.
<div style="margin-right: -0.5in;">
<div style="margin-right: -0.5in;">

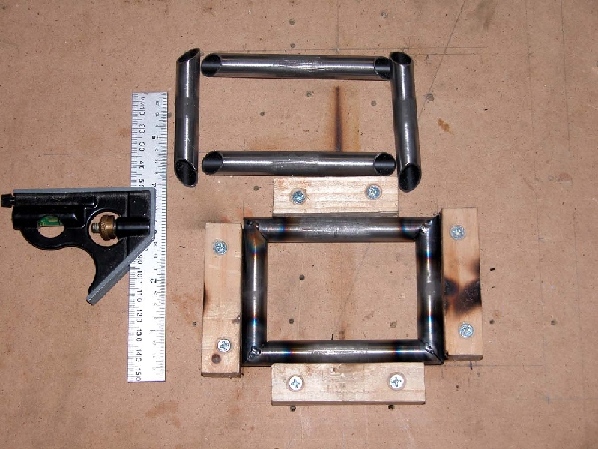
The rudder pedal jig holds all the tubes in position
for fitting and welding. Be sure to make
a left and right jig.
<div style="margin-right: -0.5in;">
<div style="margin-right: -0.5in;">
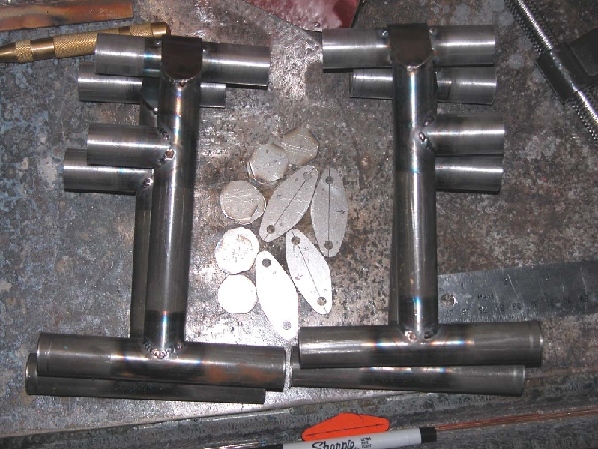
There are quite a few parts to these "easy to
build" rudder pedals. I think I
counted 45. I cut all the brackets and
slugs on my band saw then ground them to the lines with my bench grinder. I always center punch parts like these
through pin holes that I put in the patterns.
Leave the round slugs a little large and drill the center holes before
tack to the rudder pedal.
<div style="margin-right: -0.5in;">
<div style="margin-right: -0.5in;">After drilling the rudder pedal slugs for the brake
pedal axle, you need to make a jig for centering the slugs on the top rudder
pedal tube. To do this:
<div style="margin-right: -0.5in;">1. Tack weld
the basic rudder together.
<div style="margin-right: -0.5in;">2. Make up a
long 3/16 rod (about 2" longer than the top tube on the rudder pedal)
<div style="margin-right: -0.5in;">3. Cut 2
pieces of angle iron about 1.5" long.
Draw a centerline on both angle irons and then drill a 3/16" hole
7/16" up from the bottom of the angle iron.
<div style="margin-right: -0.5in;">4. Line up the
angle irons on the center line of the top rudder pedal tube so that they will
hold the slugs tight against the tube.
Screw them to the table.
<div style="margin-right: -0.5in;">5. Slide the
3/16" rod through the angle iron, slug, tube, slug and angle iron.
<div style="margin-right: -0.5in;">6. Tack weld
the slugs in place.
<div style="margin-right: -0.5in;">
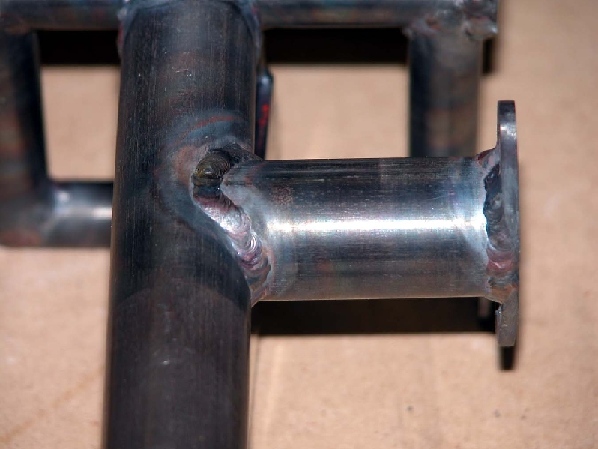
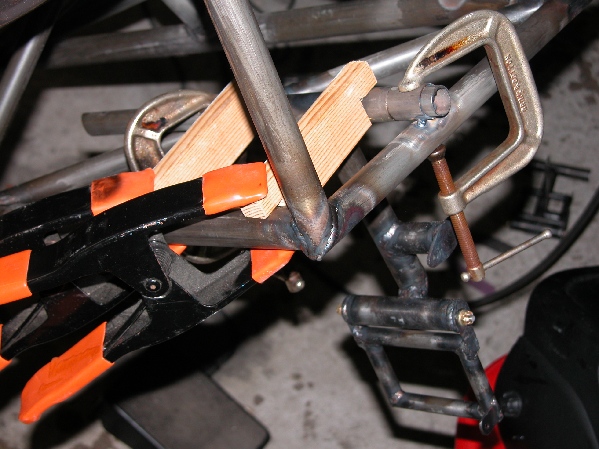
<div style="margin-right: -0.5in;">The next step is to align the brake pedal to the
rudder pedal and weld the axle tabs on the brake pedals. To do this:
<div style="margin-right: -0.5in;">1. Cut a wood
strip spacer to place between the rudder and brake pedal.
<div style="margin-right: -0.5in;">2. Align and
shim up the rudder pedal 3/16" to align the centerlines of both pedals.
<div style="margin-right: -0.5in;">3. Clamp the
brake pedal in place.
<div style="margin-right: -0.5in;">4. Make the
brake pedal axle tabs and drill them for the axle.
<div style="margin-right: -0.5in;">5. Thread the
3/16" brake axle rod according to the plans.
<div style="margin-right: -0.5in;">6. Slide the
3/16" axle through the first tab, a washer, then through the rudder pedal
tube, the second washer, and finally through the second axle tab.
<div style="margin-right: -76.5pt;">7. Snug the
axle nuts and level and align the axle tabs to the brake pedal and tack weld.
<div style="margin-right: -0.5in;">
<div style="margin-right: -0.5in;">
Once the brake pedals are hinged, weld on the
remaining brackets.
<div style="margin-right: -0.5in;">
<div style="margin-right: -0.5in;">
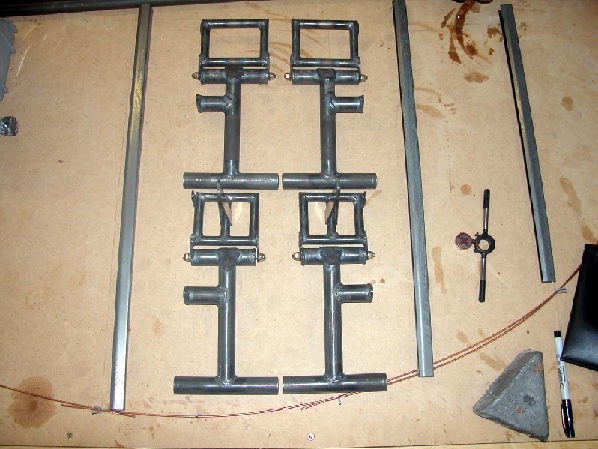
These are the completed rudder pedals.
<div style="margin-right: -0.5in;">
<div style="margin-right: -0.5in;">
This is the simple jig that I used to install the
front rudder pedals in the fuselage. It
consists of 2 - 1x2 sticks that are notched to the correct length. Use the same technique for the rear rudder
pedals. Helpful hint: Don't install the rudder pedals until you
install the seats and can actually sit in the cockpit and locate the pedals to
fit you.