


Haven't posted anything in awhile, so I thought I might put up my assembly of the upper wing attach fittings for a Skybolt Delta.... in case anyone was curious.
I started out with flat .125 4130 sheet and drew the fittings out on a CAD program. A pencil and paper will work fine also. Each fitting consists of 4 separate pieces....two side plates, a top plate, and a drilled attach point for the wires.
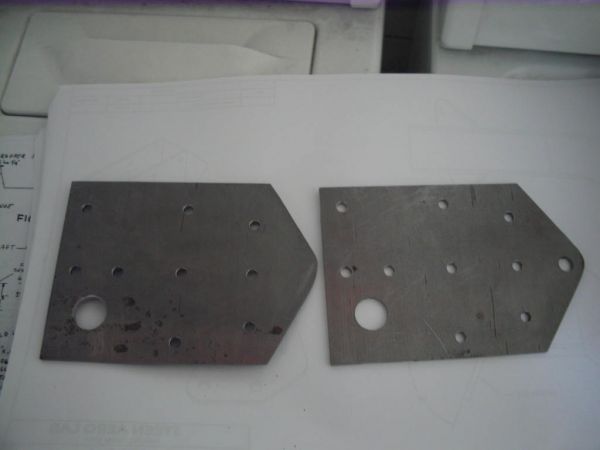
You will be using two different size side plates. You will have to make sure you MATCH DRILL these plates exactly as indicated in the drawings.
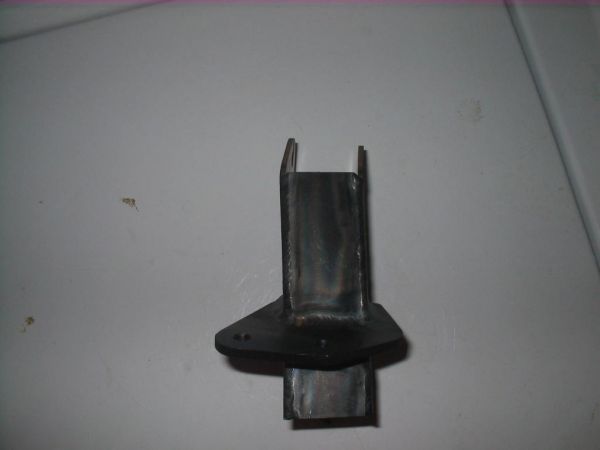
They kinda look like this:
You then have to bend angles int hem, as indicated int he drawings, of 6.5deg. Note: Some folks have had problems bending these because the bend is so close to the drilled holes.....you may want to drill after you bend. I bent mine with no issues after I drilled.....so, buyer beware.
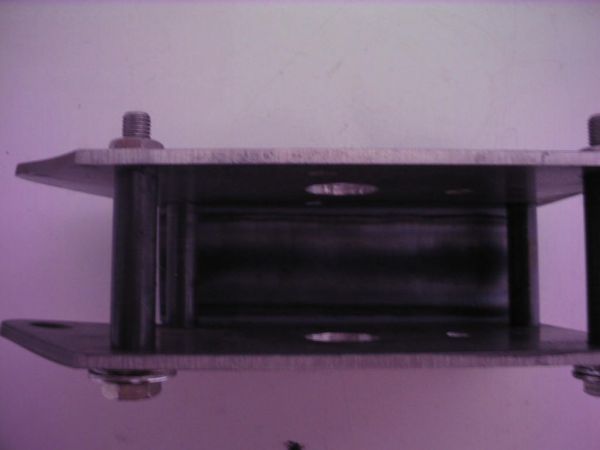
Next stpe is to weld the bottom plate on these two pieces. Since they must be an exact distance apart, spacers need to be built that can hold these pieces in alignment and spaced apart. I guess you could use wood...I chose to cut some spacers in the lathe and bolt these pieces together at the four corners, like so:
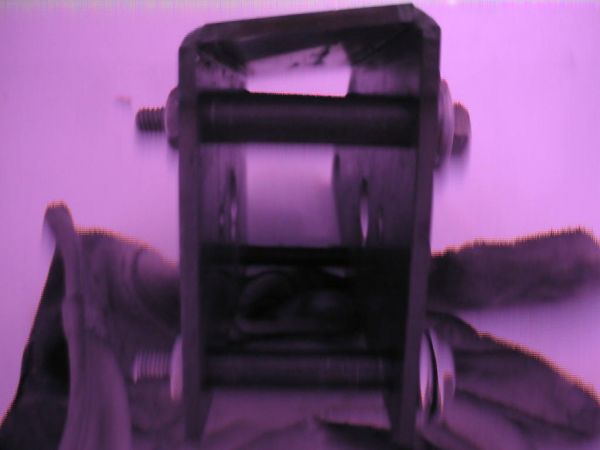
The bottom plate is welded on at an angle. This is a bit of a tricky weld, because the bottom plate does not lay on top of the side plates. It is an L-jointbutt weld. I used magnets to suspend the plate in place while I tacked it at the four corners. This nextside view shows the weld fillet and the butt weld...(sorry for the screwed up pics...I'm not Arney Freytag)
Once it's tacked, you can lay a nice fillet along the length of the plate:
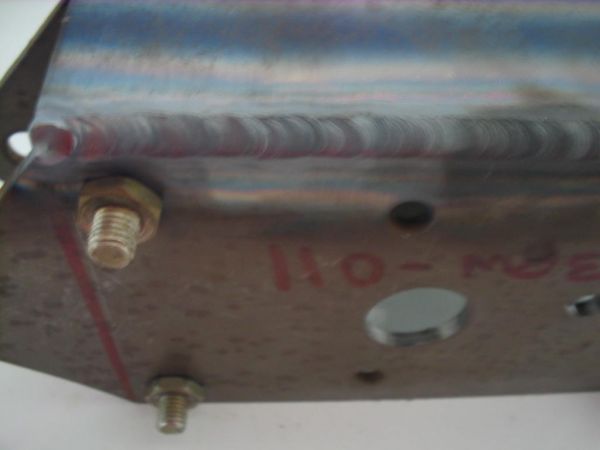
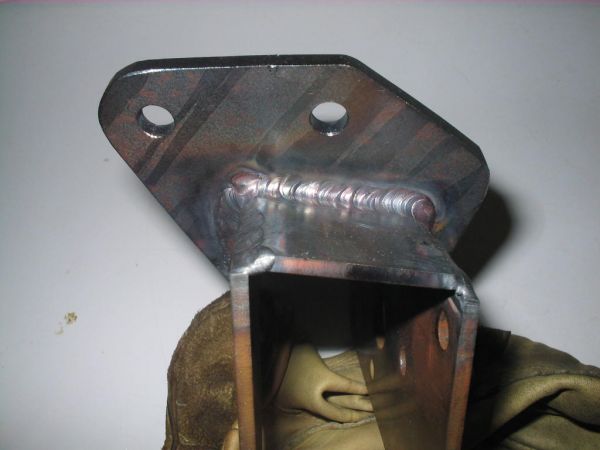
Next comes the third piece, which has to be fit at a 64deg angle. I used a piece of 2" blaock cut at the proper angle and clamped it to the plate assembly, then clamped the final piece to it and welded away...looks something like this:
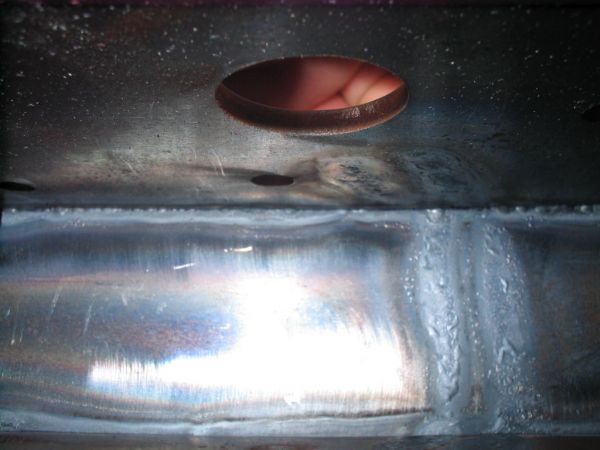
If you get good penetration, you'll see some of this on the underside of your weld:
That's all I have.....feel free to post better ideas or constructive criticisms. Hopefully we can see some more Delta stuff posted here. Jim had assembled a center wing section that looks great, so you can find his post and see where this piece fits in.
I started out with flat .125 4130 sheet and drew the fittings out on a CAD program. A pencil and paper will work fine also. Each fitting consists of 4 separate pieces....two side plates, a top plate, and a drilled attach point for the wires.
You will be using two different size side plates. You will have to make sure you MATCH DRILL these plates exactly as indicated in the drawings.
They kinda look like this:
You then have to bend angles int hem, as indicated int he drawings, of 6.5deg. Note: Some folks have had problems bending these because the bend is so close to the drilled holes.....you may want to drill after you bend. I bent mine with no issues after I drilled.....so, buyer beware.
Next stpe is to weld the bottom plate on these two pieces. Since they must be an exact distance apart, spacers need to be built that can hold these pieces in alignment and spaced apart. I guess you could use wood...I chose to cut some spacers in the lathe and bolt these pieces together at the four corners, like so:
The bottom plate is welded on at an angle. This is a bit of a tricky weld, because the bottom plate does not lay on top of the side plates. It is an L-jointbutt weld. I used magnets to suspend the plate in place while I tacked it at the four corners. This nextside view shows the weld fillet and the butt weld...(sorry for the screwed up pics...I'm not Arney Freytag)
Once it's tacked, you can lay a nice fillet along the length of the plate:
Next comes the third piece, which has to be fit at a 64deg angle. I used a piece of 2" blaock cut at the proper angle and clamped it to the plate assembly, then clamped the final piece to it and welded away...looks something like this:
If you get good penetration, you'll see some of this on the underside of your weld:
That's all I have.....feel free to post better ideas or constructive criticisms. Hopefully we can see some more Delta stuff posted here. Jim had assembled a center wing section that looks great, so you can find his post and see where this piece fits in.