


Ok, here's part one of a multi-part posting. These brackets have an inside spacing of5/16", which made it impossible to use wooden bending blocks as the manual shows for other parts. The blocks just aren't durable enough. So, I used 5/16 thick steel bar.
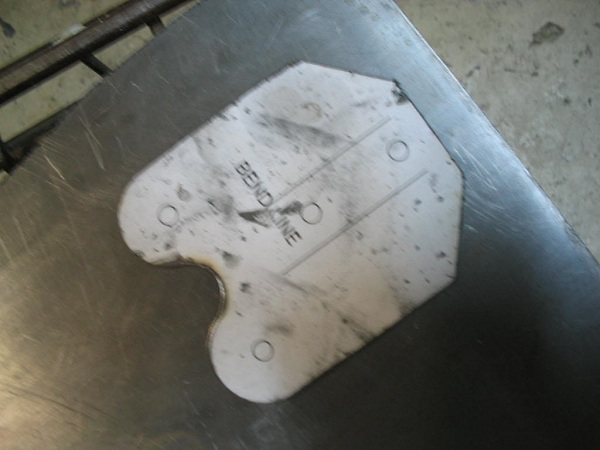
I first drew out the pattern of the part, making necessary allowances for the bends.I printed the pattern, cut them out, and glued the paper pattern to the sheet steel, .071 4130 sheet.
After this is done, I used a jigsaw to cut them out. A band saw is probably better, but I feel more comfortable using a jigsaw. A variable speed jigsaw is necessary, using the slow speed so as not to heat the blade up.
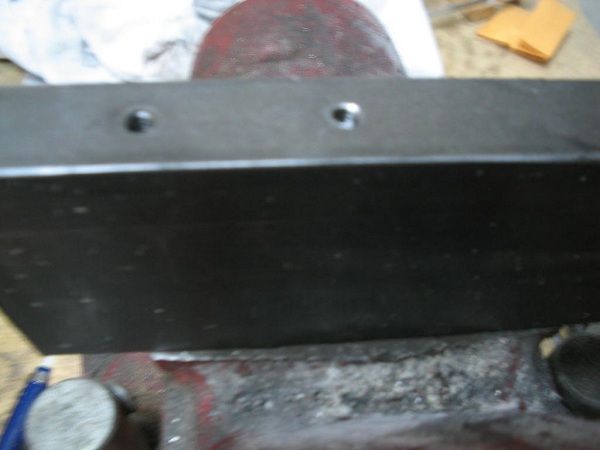
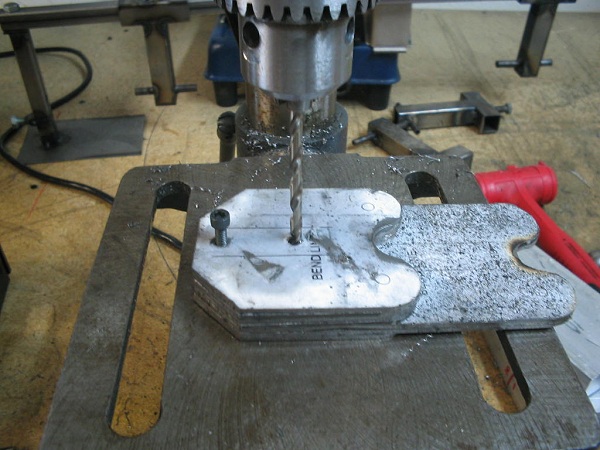
Next, I drilled two holes in my cut-out piece so that I could use my piece as a drilling guide. I drilled and tapped two holes in the edge of the steel blocks that I will use to bend these. I used 8 -32 machine screws, 1 inch long. These are plenty strong enough.
Then I screwed the cut-out pattern piece of steel to the bending block like so. I clamped the bending block tightly in a large vice.

I then proceded to used a 4lb dead blow hammer. The plastic0coated dead blow hammer deliver maximum force without dinging up the metal.
The finished product of bending looks something like this (after drilling the hole, of course):

Since every hinge has a hole drilled int his location, I went ahead and drilled them all. Some of the hinges will have bushings that go all the way through them and some will not. This is an under-sized pilot hole that I drilled.
The next pic shows a step that is important. Once you get the bending block drilled, it's a good idea to drill all of the flat parts to match the holes in the bending block, so the screws will line up. I cheat and drill them all at the same time:
Remember....do not drill these holes to final 3/16" size. They must be reamed to final size, as with all holes. Drill them big enough for the 8 -32 screws to go through, and later you'll have the pilot holes for the reamers.
Next pic is all of my bent pieces lined up. The next step, which I'll cover in another post, is to drill them and weld the correct bushings to them. Stay tuned....

These aren't bend to the left...it's the picture that's bent.
Ok, so I ain't a photographer....
<beej: edited to resize imgs
I first drew out the pattern of the part, making necessary allowances for the bends.I printed the pattern, cut them out, and glued the paper pattern to the sheet steel, .071 4130 sheet.
After this is done, I used a jigsaw to cut them out. A band saw is probably better, but I feel more comfortable using a jigsaw. A variable speed jigsaw is necessary, using the slow speed so as not to heat the blade up.
Next, I drilled two holes in my cut-out piece so that I could use my piece as a drilling guide. I drilled and tapped two holes in the edge of the steel blocks that I will use to bend these. I used 8 -32 machine screws, 1 inch long. These are plenty strong enough.
Then I screwed the cut-out pattern piece of steel to the bending block like so. I clamped the bending block tightly in a large vice.
I then proceded to used a 4lb dead blow hammer. The plastic0coated dead blow hammer deliver maximum force without dinging up the metal.
The finished product of bending looks something like this (after drilling the hole, of course):
Since every hinge has a hole drilled int his location, I went ahead and drilled them all. Some of the hinges will have bushings that go all the way through them and some will not. This is an under-sized pilot hole that I drilled.
The next pic shows a step that is important. Once you get the bending block drilled, it's a good idea to drill all of the flat parts to match the holes in the bending block, so the screws will line up. I cheat and drill them all at the same time:
Remember....do not drill these holes to final 3/16" size. They must be reamed to final size, as with all holes. Drill them big enough for the 8 -32 screws to go through, and later you'll have the pilot holes for the reamers.
Next pic is all of my bent pieces lined up. The next step, which I'll cover in another post, is to drill them and weld the correct bushings to them. Stay tuned....
These aren't bend to the left...it's the picture that's bent.
Ok, so I ain't a photographer....
<beej: edited to resize imgs