


First thing is first....draw the part on a CAD program of your choice, or the old fashioned way. Either way works fine.
The plans show a dimension of 2" from the center of the big hole and the 3/16 hole on the bottom. There was discussion here as to the plans showing this dimension from a side view and a top view. The way it is drawn, the side view angle would place the holes closer together. That is incorrect....looking down fromthe top of the bracket, center-to-center on these two holes should be 2" after bending.
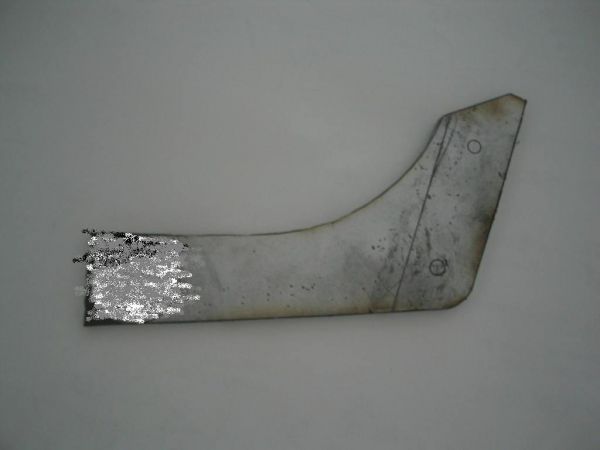
Well, you ask, a complicated task it must be to get that right...not really! Do yourself a favor and measure the distance AFTER you bend. See below pic....I cut out form with extra length so I could measure then cut to fit later....
Make your bends using the prescribed radius in the plans (3/8"). I used aluminum bending blocks that I radiused with a router, but some may use wood...whatever suits you.
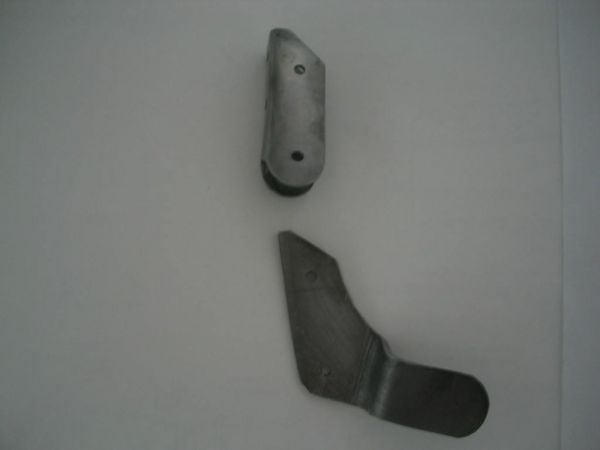
After bending, you want to match the part up with the aileron hinge it will be mated to. Remember, you're making two upper, two lower, left and right each!! WHen you match it up, you can then drill the 3/16" holes under-sized and ream to final size. That way, the holes will match perfectly!!! You can then measure the distance between the lower 3/16" hole and the larger 3/4" hole, and finish off the bracket. See pic:
Me thinks it's starting to look like the picture on the Steen website...

Ok, back to work! Next step is drilling the big hole and fitting the bushing for the bearing. The pic is distorted, but the hole is really perfectly round...It should be atight fit so you can get a good weld. You'll end up with this:
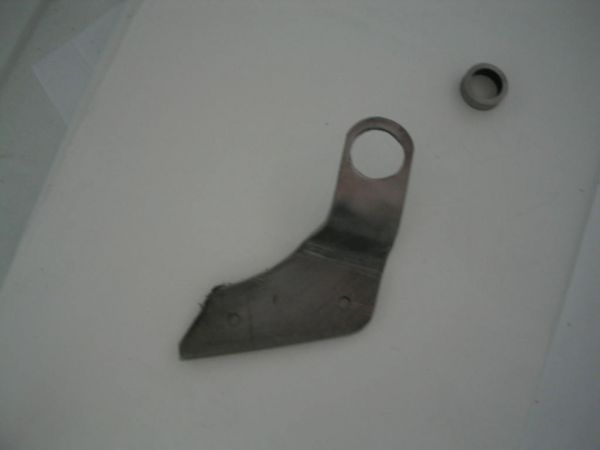
The bushing is cut out from a length of tubing, per plans, on the lathe. If you don't have a lathe, buy a cheapo and learn how to use it...it'll save your life sometimes!!
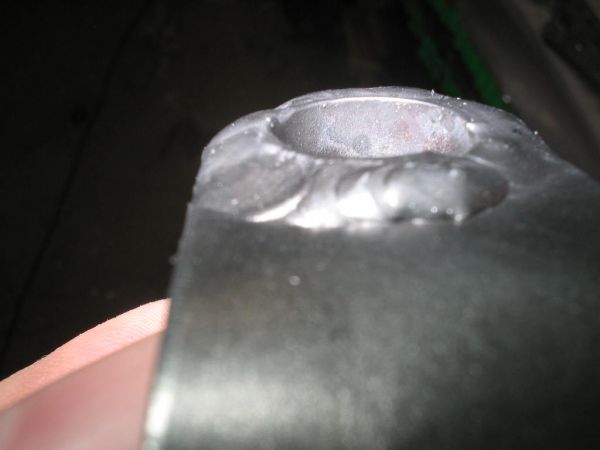
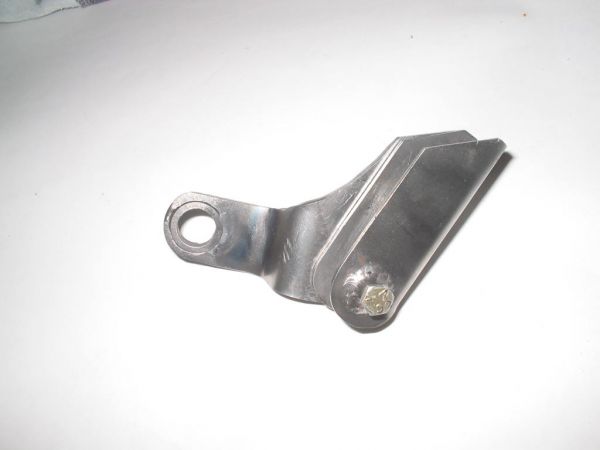
A quick trip to theTIG machine and you get a good weld. Now, TIG guys keep in mind that you are welding around an edge andmelting away that edge is very easy. Even though the bushing material is .095 and the bracket is .125, the old addage of, "one amp per .001" does not apply here. You WILL burn a hole in the bushing. I used .065 rod and 80 amps, and pedal'd it almost max to get the penetration and puddle I wanted.
My result is this:
DO NOT REAM INSIDE OF BUSHING UNTIL AFTER WELDING!!!It will not be round if you do. Wait until after you weld, them ream to.0005 smaller than bearing size. Remember, this bearing needs to be press-fit, but it is a small,relatively fragile bearing. It needs a light press so as not to damage the bearing, then the edges of the bushing need to be straked as an added measure to hold it in place. Loctite bearing retaining compound may work well also, but I don't trust this compound with the rapidly changing temperatures your aircraft will encounter, so Iwill not use it.
When you're done, you'll have something that looks like this:

No, that's not crinkled metal in the bend....it's waded-up glue and paper fromt he pattern. A little cleaning is in order.
WHen you're done, you'll have a bracket that is perfectly mated to your aileron brackets. See pic:
Yea, the aileron brackets were made by yours truly also. I need to get them powder-coated. I posted that project in another topic.
Randy made some nice slave brackets from aluminum, and they are shown in the manual. They are nice pieces, and you may want to pursue that route instead of this type. I am following the plans for most brackets, so that is why I posted this and made these....you make your own decision.
What is nice is that the manual is a work in progress, and gives the builder more choices than the plans...and choices are a good thing. Edited by: scottly