


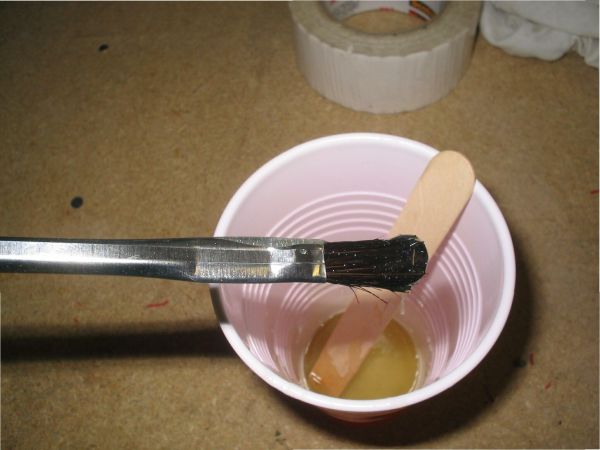
Here are some pics of my completed ribs.... maybe I can list some mistakes so some guys won't make the same ones I did. Here is a pic of what I use to mix and apply epoxy. I used System Three T-88 epoxy. I used plastic party cups you buy at any grocery store, wooden sticks I found by the bundle at a craft shop, and the brushes are flux brushes that plumbers use to apply solder flux. These brushes can be had on ebay for about $20 per hundred. Use them once and throw them away.
Next is the jig I used. I use 3mil builder's plastic instad of wax paper. Wax paper leaves a residue that must be removed before gluing gussets on other side....plastic leaves no residue.
The lead weights are 2 three ounce fishing weights with a brad nail through the center to hold them together. I have found that 6 onces produces the right amount of squeez-out that I was looking for. I know, they are not nice, pretty round steel weights, but these are cheap, available at Walmart, and it gets the job done. Youy may ask yourself about the amount of squeeze-out I have...compared to others you may have seen, it looks like a lot. Well, in my expereicne, if you don't have squeeze-out from every angle, you have a glue-starved joint. My own test-to-failure joints have proven this to me. Do as you wish, but AI prefer this method. You can take the excess off later with a quick trip to the belt sander. Again, it's just my way....your mileage may vary.
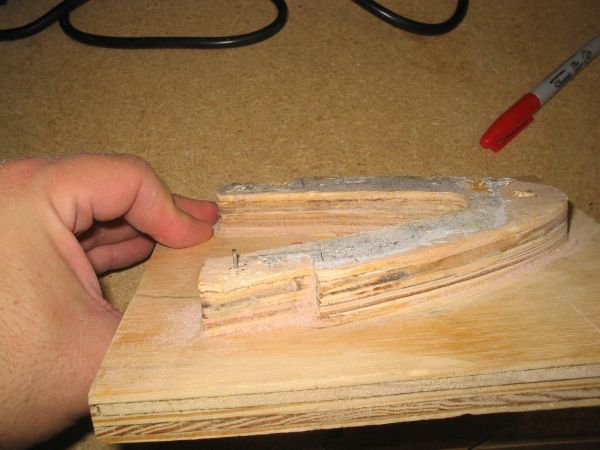
This next pic is my nose rib template. I would take a square of birch ply and use a brad nailer to nail it to the template. Using a trim bit in a router, I then trim around to produce my nose rib. The template is made from 3/4 ply and glued to 3/4 ply to support it. You can screw the base to your bench to make life easier for you. The paper you see is what's left of the plans cut-out I glued to the plywood before I cut it with my bandsaw to create the template.
Next is the jig I used. I use 3mil builder's plastic instad of wax paper. Wax paper leaves a residue that must be removed before gluing gussets on other side....plastic leaves no residue.
The lead weights are 2 three ounce fishing weights with a brad nail through the center to hold them together. I have found that 6 onces produces the right amount of squeez-out that I was looking for. I know, they are not nice, pretty round steel weights, but these are cheap, available at Walmart, and it gets the job done. Youy may ask yourself about the amount of squeeze-out I have...compared to others you may have seen, it looks like a lot. Well, in my expereicne, if you don't have squeeze-out from every angle, you have a glue-starved joint. My own test-to-failure joints have proven this to me. Do as you wish, but AI prefer this method. You can take the excess off later with a quick trip to the belt sander. Again, it's just my way....your mileage may vary.
This next pic is my nose rib template. I would take a square of birch ply and use a brad nailer to nail it to the template. Using a trim bit in a router, I then trim around to produce my nose rib. The template is made from 3/4 ply and glued to 3/4 ply to support it. You can screw the base to your bench to make life easier for you. The paper you see is what's left of the plans cut-out I glued to the plywood before I cut it with my bandsaw to create the template.