


AlRice
Well-Known Member
- Joined
- Aug 18, 2006
- Messages
- 262
- Reaction score
- 0
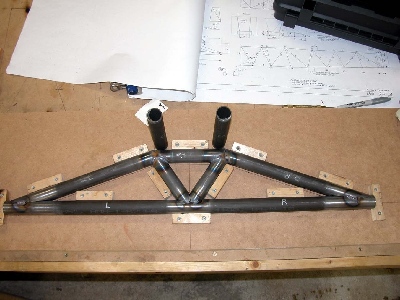
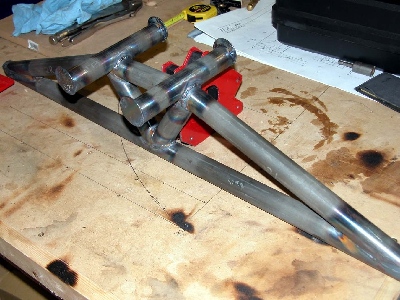
<div style="text-align: center;" align="center">Landing Gear Truss Fabrication
<div style="">
<div style="">Note: I recommend fabricating the landing gear truss before starting on the fuselage so that it can be used to properly
space the bottom longerons when assembling the 2 fuse sides to each other.
<div style="">
<div style="">Step
1: Draw the truss layout on a board cut
about 4" longer than the finished truss.
<div style="">Step
2: Screw jig blocks to the board to hold
all the tubes in position.
<div style="">Step
3: Cut the bottom tube to length, making
it a little longer than needed.
<div style="">
Step
4: Cut the upper right and left tubes
about 1â longer than the final dimension.
<div style="">Step
5: Using a bench grinder, fit the upper
right and left tubes to the bottom tube.
<div style="">Step
6: Miter the upper ends of the upper
right and left tubes. Use a square to
ensure that the upper and lower sides of the tube ends are square with the jig
board. A 12â disc sander makes this job
easy.
<div style="">Step
7: Cut the top center tube a little
longer than needed and miter the ends to fit the right and left tubes.
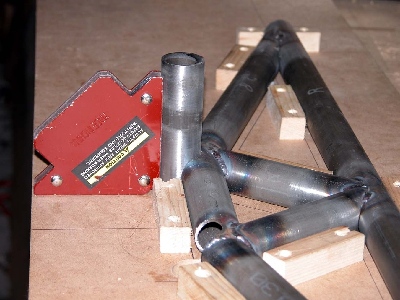
<div style="">Step
8: Using a tubing notcher and/or bench
grinder, fit the 2 âVâ tubes.
<div style="">Step
9: Tack everything weld together.
<div style="">Step
10: Take the truss out of the jig and on
the jig board, mark the longeron intersections so that the bottom of the
longerons will be flush with the bottom of the truss tube.
<div style="">Step
11: With a proper size holesaw, cut
through the jig board at the longeron and bungee tube intersections.
<div style="">
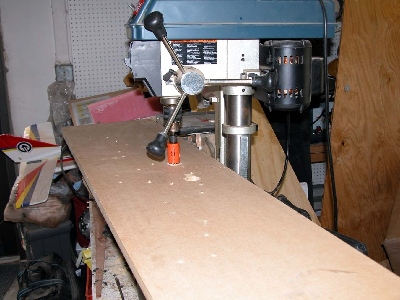
Step
12: Put the truss back in the jig and
place the assembly upside down on your drill press.
<div style="">Step
13: Take the pilot drill out of the
holesaw.
<div style="">Step
14: Keeping the jig level and using the pre-sawn
holes in the jig as a guide, drill down through the truss at the 4 locations
for the longeron and bungee tubes.
<div style="">
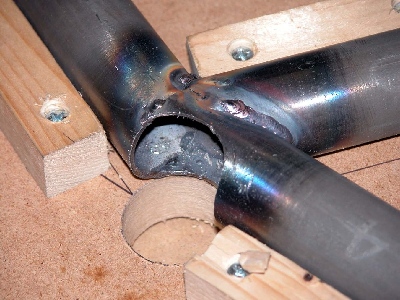
Step
15: Cut the bungee tubes to length,
center and square them on the truss, and tack weld while the truss is still in
the jig.
<div style="">
Step
16: Remove the truss from the jig and
tack weld the 4 end plates to the bungee tubes.
<div style="">Step
17: Finish weld the assembly.
Edited by: AlRice